These are some of my more complex side-projects: I do these for fun but I apply rigorous principles to keep costs low and design an easy manufacturing process.
Codename: Robot Gear
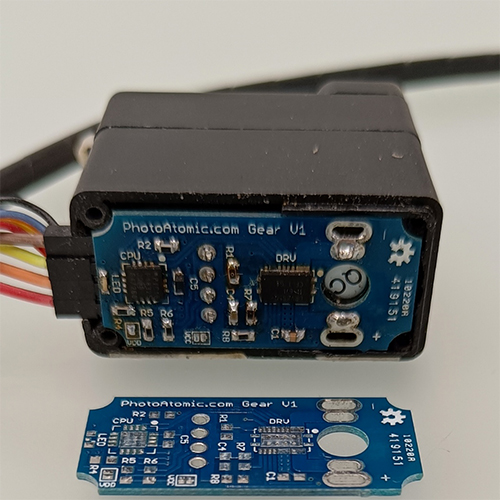
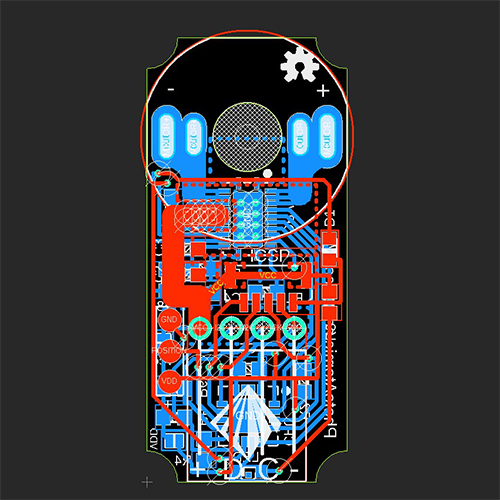
This is an in-place replacement board for robotic servo-motors. Comercialy available servos have good mechanic but proprietary chip that prevents programming of the motors.
I've designed an in-place replacement board with a cheap but powerful microcontroller. I've implemented a feature complete communication stack in firmware over the i2c bus.
The C firmware is modularized and the control program can be flashed via the I2C bus itself. Moreover the bus is bi-directional, so it is always possible to read position, velocity , voltage and current consumption of each motor.
the control can be programmed easily via standard development tool for the microchip family and uploaded via a normal programmer/debugger or via the i2c bus via an utility program
The replacement board have a BOM < 11 euros. The comercialy availabe robotic servos with similar features costs about 10 time more.
Codename: Chat Ax
This is a mesh communication device that looks like a cute keychain. it uses a low power long range radio protocoll to cover kilometer-range distance,, each node can be a repeater to cover longer distance, also each node can be a gateway for a known wifi network to extend further the communication range.
The purpose is to send short message without the need of any cellular network at no cost.
here some design iterations for size and fit tests printed with a 3D printer

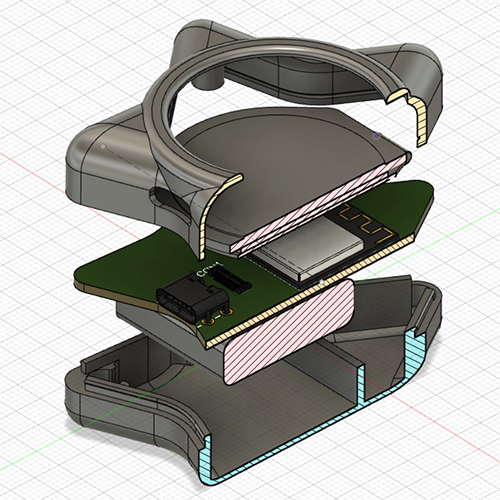
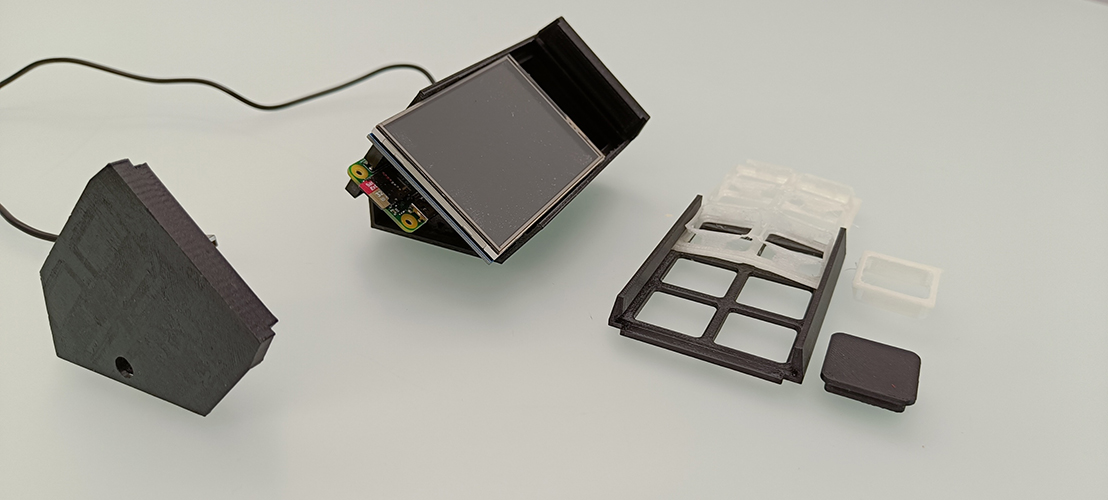
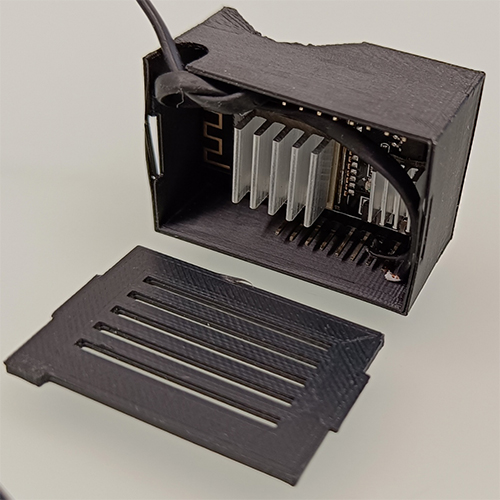
Codename: CheapDeck
One day I would have a control deck like the StreamDeck device, but without the excessive cost, so I've built one myself
It is based on the cheap Raspberry PI Zero W (10 euro board) a small wifi enabled linux microcomputer.
I want the device to be as cheap as possible but packed with cool features. i want to be able to program i t in a high level language like C# and to have advanced 3D graphic capabilities.
The problem with the old raspberry pi zero is that it is an ARM v6 device which is not suppored by the new .NET core plus the graphic accelerator of the raspberry pi zero was accessible by using vulkan library, plus the chap resistive touch display uses just the SPI bus so it was required to output the video render on the SPI bus instead on the more powerful HDMI interface.
I've leveraged the FNA opensource library (port of the old Microsoft XNA) and compiled it with special vulkan support.
I'm able to render complex 3d scene e at 5 FPS which is solely a limitation of the SPI bus bandwidth.
Anyway it is more than enough for a device that have to display static content most of the time and very rarely display 3D animations.
ChepDeck uses a 3D printed complaint mechanism as recoil mechanism for its transparent resin buttons., they simpy have pins that triggers the resistive touch screen in certain spots. the design maximize the display area of the buttons. so they really looks like mini screens!
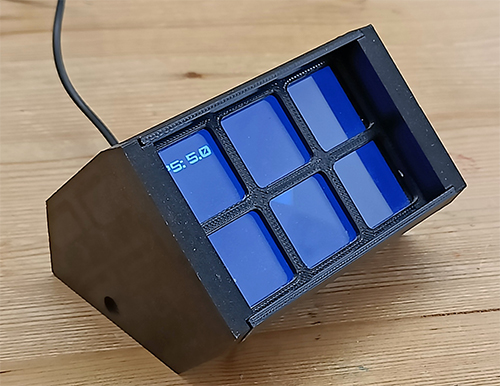
Pretty impressive for a 10€ device!
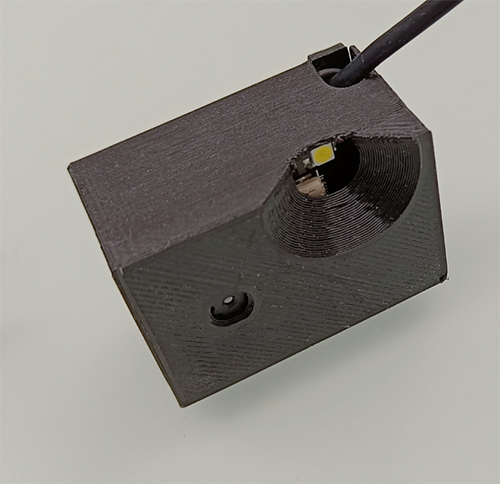
Codename: ControlCam
this project leverages a cheap ESP32 processor that streams a live feed of images captured by a tiny cam via a web interface over a WiFi connection
it was developed to keep an eye on long process such as 3D printing or bread leavening process.
The device includes a powerful LED that can be turned on and off via the web interface so to monitor slow process that occurs in the dark.
It is grid powered.
Just open the cam URL and you can have a glance of how the process is going, the entire cam costs less than 5 euros!
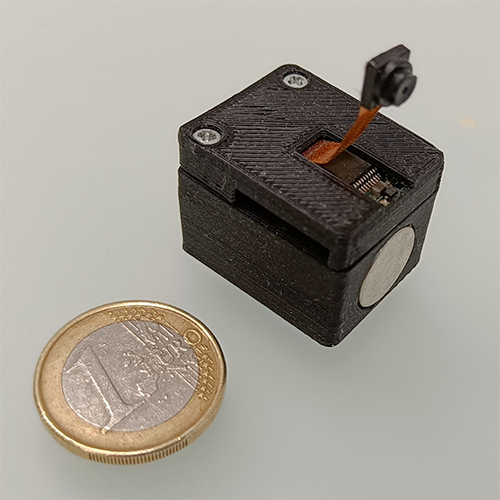
Codename: TinyRecorder
This is a conversion of a toy drone board that was crashed and unable to fly anymore.
This coin-sized cam can record on an SD car and can be charged via an USB port, i've also embedded a magnet so i can attach it in my car to record what happens around while it is parked.
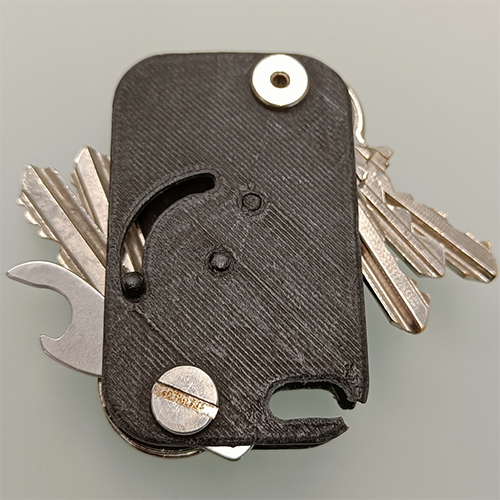
Codename: SwitchKey
My daily-driver key holder, the same size of my car knob, it can holds up to 6 different keys.
I have developed it using the concept of the switchblade kniife: a simple lever on the top ejects all the keys in a fan arangment so to allow to pick the required one easily
Mine lasted several yeas but at the end the key ring broke, next time i'll use a more flexible material, this one was 3D printed using a carbon fiber reinforced filament. It toourns out that it was too rigid for someone that stays in a pocket the major part of its life, flexible materials are better for this purpose!
Codename: Gahiru
Gahiru is my current freestyle drone, I've carefully selected and assembled the components by myself.
It is a 5" freestyle drone built on the D-Rock2 carbon frame, it have a digital video link and a light weight but hi res action cam.
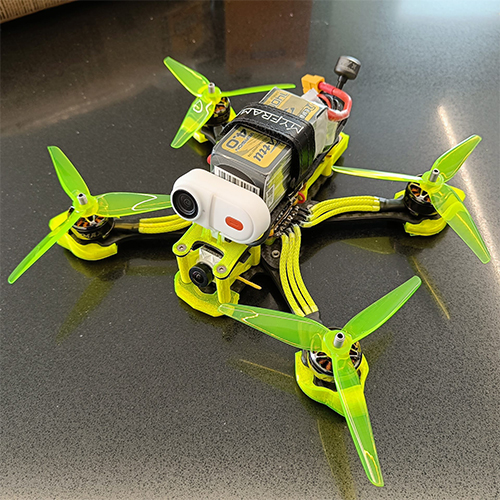
With a power-weight ratio close to 5:1 it is simply an untamable beast :D